
As an Amazon Associate, I earn from qualifying purchases.
Retrofitting DIY e-bike motors to older bicycles is easier than you think. This process can transform your old bike into an efficient e-bike.
In today’s world, e-bikes are growing in popularity. They offer convenience and an eco-friendly way to travel. But buying a new e-bike can be expensive. That’s where retrofitting comes in. By adding a motor to your old bike, you can save money and gain the benefits of an e-bike.
This guide will show you how to retrofit DIY e-bike motors to your older bicycle. We’ll cover what tools you need, steps to follow, and tips for a smooth process. Ready to give your old bike a new life? Let’s get started!

Credit: www.youtube.com
Choosing The Right E-bike Motor
There are different types of e-bike motors. Hub motors are common. They are easy to install. Mid-drive motors are also popular. They are more powerful. Choose based on your bike’s use. Hub motors are good for flat areas. Mid-drive motors work well on hills.
Check if the motor fits your bike. Measure the frame and wheel size. Older bikes may need extra parts. Battery placement is important. Make sure there is enough space. Some bikes need a new bottom bracket. This is for mid-drive motors. Hub motors fit most bikes. Read the motor specs carefully. They tell you what you need.
Essential Tools And Materials
First, gather the basic tools. You will need a wrench set for bolts. A screwdriver set is also essential. A bike stand helps hold your bike steady. Use a tire lever to remove tires. Get a hex key set for various screws.
Next, collect the necessary materials. You need a motor kit for your bike. Make sure it fits your bike model. A battery pack is also required. Don’t forget the controller to manage power. Get some zip ties to secure cables. Finally, electrical tape is crucial for safety.
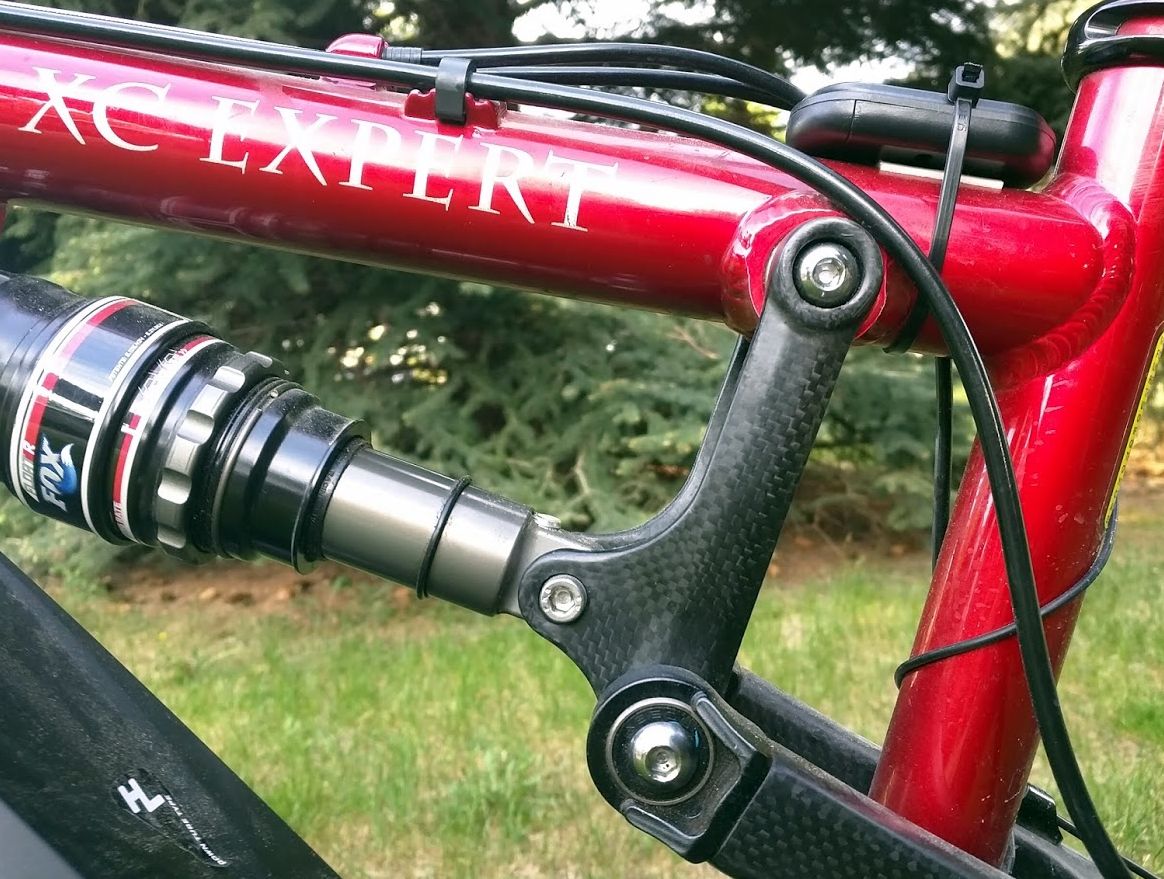
Preparing The Bicycle
Check the bicycle frame for any cracks or damage. Ensure the frame is strong enough. Look for rust, especially in hidden areas. A strong frame can handle the motor’s weight.
Clean the bicycle thoroughly. Remove dirt, grime, and old grease. Use a mild soap and water. Dry it well. Lubricate the moving parts. Apply oil to the chain, gears, and other parts. Proper lubrication ensures smooth operation.
Credit: www.pinkbike.com
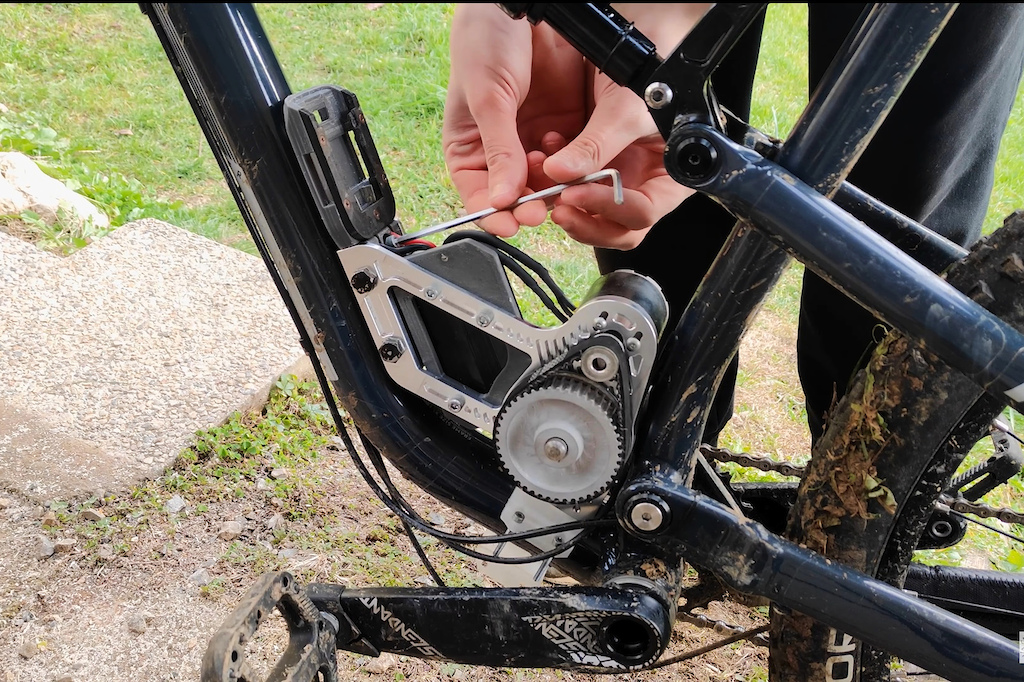
Installing The Motor
Start by choosing a sturdy part of your bicycle frame. The motor should be placed near the pedals. This position helps with balance. Use metal brackets to hold the motor in place. These brackets should be strong. Tighten the screws to ensure the motor does not move. Check if the motor is aligned properly. Make adjustments if needed. Ensure the motor is secure but not too tight.
After mounting, double-check the motor’s stability. Use additional straps if necessary. These straps will keep the motor in place. Make sure all bolts are tight. Loose bolts can cause problems. Test the motor by gently shaking it. If it moves, tighten it more. Secure any loose wires. Loose wires can get tangled. Keep everything neat and tidy.
Setting Up The Battery
Mounting the battery securely is crucial when retrofitting DIY e-bike motors to older bicycles. Ensure it is well-balanced and properly connected for smooth rides.
Battery Placement
Choose a spot on your bike for the battery. A common spot is the frame’s down tube. This keeps the bike balanced. Make sure the battery is secure. Use brackets or straps to hold it in place. It should not move while riding. Check the weight limit of your bike. Do not overload it. Always prioritize safety.
Wiring The Battery
Connect the wires from the battery to the motor. Ensure the connections are tight. Loose wires can be dangerous. Use zip ties to keep wires tidy. Avoid letting wires dangle. This can cause accidents. Always follow the wiring diagram. This ensures correct connections. Double-check all connections before turning on the bike.
Connecting The Controls
Connecting the controls for retrofitting DIY e-bike motors to older bicycles involves integrating wires and switches. Ensuring proper alignment and secure connections is crucial for smooth functionality.
Handlebar Controls
Attach the handlebar controls securely. Use a screwdriver for a tight fit. Ensure the controls are reachable. You should not stretch to use them. Check for any loose parts. Tighten all screws if needed. Test the buttons. They should respond quickly.
Throttle Installation
Install the throttle on the handlebar. Position it comfortably for your thumb. Connect the throttle wire to the motor. Use zip ties to secure the wire. Keep the wire away from moving parts. Test the throttle before riding. Make sure it works smoothly. Adjust if it feels stiff or loose.
Testing The E-bike
Retrofitting an older bicycle with a DIY e-bike motor can be an exciting project. With the right tools, you can transform your bike into an electric one. Enjoy the benefits of an e-bike without buying a new one.
Initial Test Ride
Take your bike to an open area. A parking lot or a park will do. Check the brakes before you start. Turn on the motor. Pedal a few times. Feel the power boost. Make sure the bike moves smoothly. Listen for any strange sounds. Stop often to check the motor. Ensure all parts stay in place.
Troubleshooting Issues
If the bike does not start, check the battery. Ensure it is fully charged. Inspect the wiring for loose connections. Ensure no wires are damaged. If the motor makes noise, check for loose bolts. Tighten them if needed. Make sure the chain is not too tight or too loose. Adjust as necessary.
Credit: www.mrmoneymustache.com
Maintenance Tips
Check your bike parts often. Look for loose bolts or nuts. Ensure the motor is secure. Inspect the tires for wear and tear. Make sure brakes work well. Look at the chain for rust. Clean and oil the chain if needed. Examine the wiring for any damage. Keep the bike clean to see issues easily. Always test ride after checks.
Charge the battery fully before first use. Avoid letting it drain completely. Store the battery in a cool place. Do not expose it to extreme heat. Clean the battery terminals often. Use a soft cloth for cleaning. Check for any cracks or damage. Replace if you find any. Always use the charger that came with the battery. Store the bike in a dry place.
Frequently Asked Questions
What Tools Do I Need For Retrofitting?
To retrofit an e-bike motor, you need basic tools like wrenches, screwdrivers, and pliers. You may also need a bike stand and specific motor kit tools.
Can Any Bicycle Be Retrofitted With An E-bike Motor?
Most bicycles can be retrofitted, but compatibility depends on the frame and type. Check the motor kit specifications to ensure it fits your bike model.
How Long Does It Take To Retrofit An E-bike Motor?
Retrofitting an e-bike motor typically takes about 3 to 5 hours. The time may vary depending on your experience and the complexity of the bike.
Is It Difficult To Retrofit An E-bike Motor?
Retrofitting an e-bike motor can be moderately challenging. Basic mechanical skills and following the motor kit instructions will help simplify the process.
Conclusion
Retrofitting an e-bike motor to an old bicycle is rewarding. You gain a new sense of freedom. The process is simple and fun. Anyone can do it with basic tools. Enjoy the journey of transforming your bike. Feel the thrill of your upgraded ride.
Stay safe and happy cycling!

Leave a Reply